Out of the box with no add-ons you can use QB price level names to create a fixed percentage increase or decrease for a customer, or a fixed custom price for an item or group of items. You will set the price level name on a customer or project. When you do an estimate, order, or invoice the customer will receive his price level and you can change it.
First go to Edit – Preferences. Click on Sales and Customers. Click on Company Preferences. You must be logged in as an Admin user to do this. Click on Use Price Levels. Click OK to save.
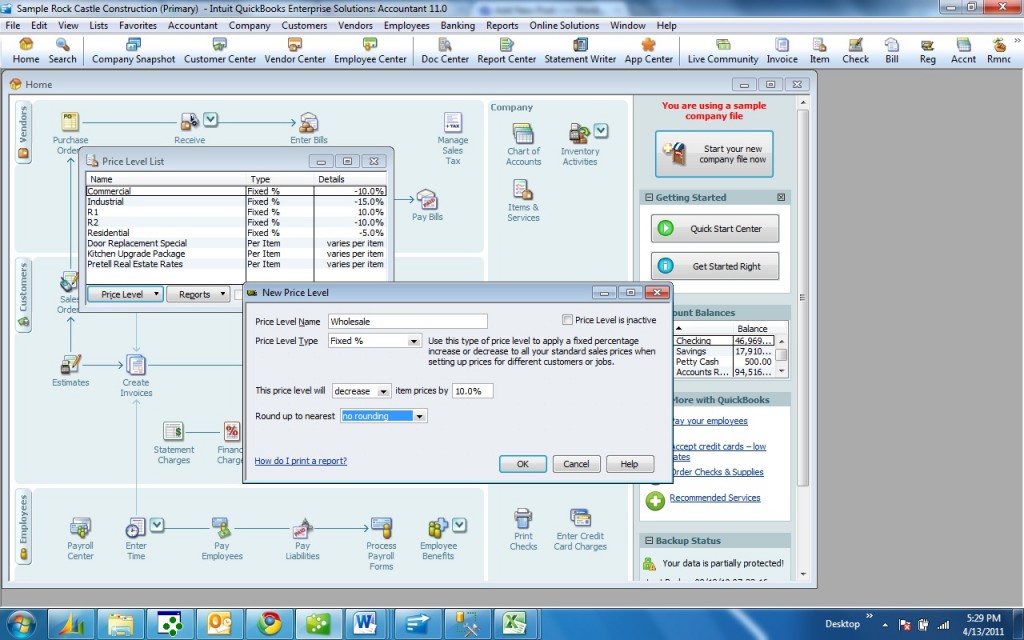
Next go to Lists – Price Level Lists. At the bottom of the screen click the Price Level button and New, or CTRL N. Enter a price level name for example Wholesale. For the moment leave it on Fixed%. Click on decrease for “This price level will”. Click Enter 10% for the discount. This is what your screen should look like.
Next click on the Customer Center, select a customer, click Edit, click Additional Info, click in the Price Level field and select a price level. In our example it would be Wholesale.
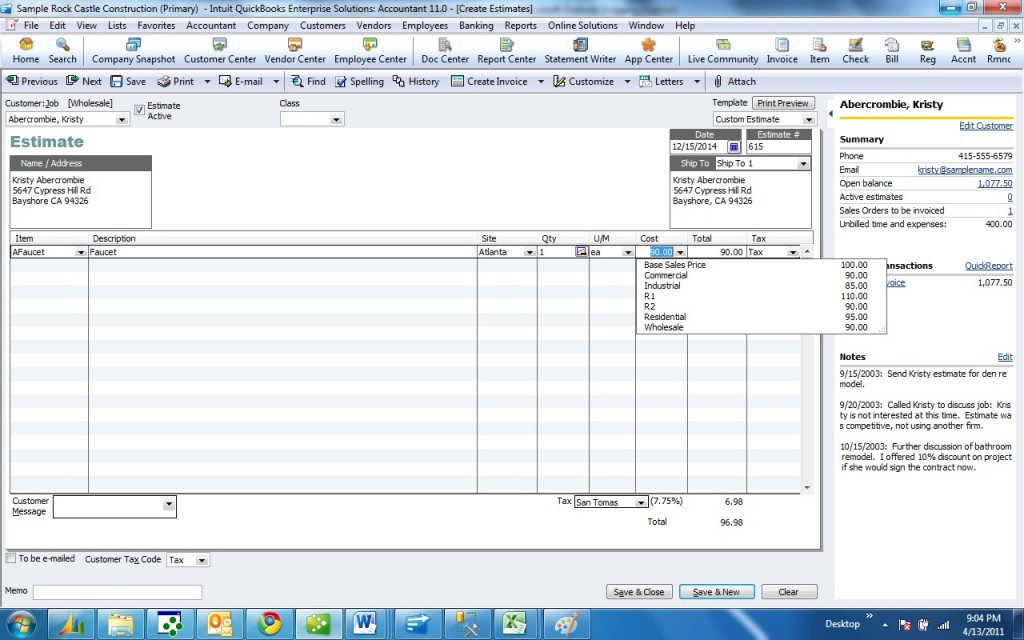
Next, create an Estimate, Order or Invoice and select your customer. As a default the pricing will be the price level we just setup. Here is an example Invoice showing the price level Wholesale we just created. The AFaucet item has a normal selling price of $100.


