[facebook_ilike]
Let’s discuss several options. Please contact us if you would like assistance importing data into your software application.
Contact Us
In all cases you must make sure you have a current backup of the company file in case the import causes unexpected results and you need to restore.
1) IIF Files. This method is for Advanced users that know a good bit about Excel and formatting data for Quickbooks. To use this method you must first create the IIF format to use for the import. Click on File – Utilities – Export – List to IIF. Check the box for the category of import you want to do, example click Items List. Click OK, give the file a name, example Item Import.IIF and save it to a folder you can access easily. Launch Excel, then open the Item Import.IIF with Excel. Open the file as Delimited, and Tab. Then you can easily manipulate the item section !INVITEM to add you data. Do not alter the headers in rows 1 and 2, column A, or the !INVITEM header row. Save the Excel spreadsheet. To import go to File – Utilities – Import – IIF Files. Select the Excel spreadsheet and click OK. The file will immediately begin to import. Some consultants say not to use IIF files as they can sometimes cause file corruption in Quickbooks.
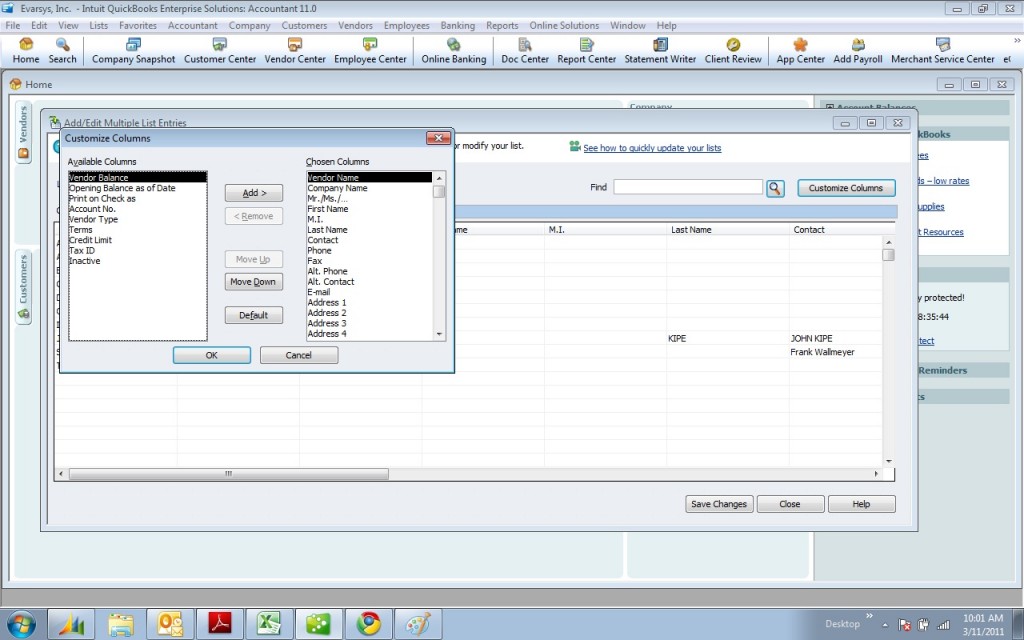
2) Add/Edit Multiple List Entries. This is perhaps the easiest method. Click on Lists, the Add/Edit Multiple List Entries. Select in the drop the type of list you want to work with; Customers, Inventory Parts, Non-Inventory Parts, Service Items, or Vendors. At the present time you cannot import the GL Chart of Accounts.
To customize the columns displayed and order of columns click on Customize Columns. Once you have the columns in the order you want create and Excel spreadsheet and put those columns in the same order. Populate the spreadsheet. Then it’s a simple matter of copying the entire column in Excel, then click in a blank cell box in QB and paste.
Once you have made all your changes to QB be sure to click on Save Changes.
You can click on any column heading to sort high to low, or low to high. You can also right click in any populated cell, with blank cells below it and select Copy Down.
3) Guided Excel Wizard. Click on File – Utilities – Import – Excel Files. In Step 1 select the type of data you want to import Customers, Vendors, Products I Sell. In Step 2 a spreadsheet will be presented to you, fill in that data columns. When done close the screen and you will be asked to Save and Add My Data Now, or I’ll Add the Data Later. If you click Save and Add My Data now you must give the spreadsheet a name. As soon as you give the file a name and click Save the import will begin. In Step 3 you can view results and verify you data. I don’t like option 3) much as it is very limited on what you can import.
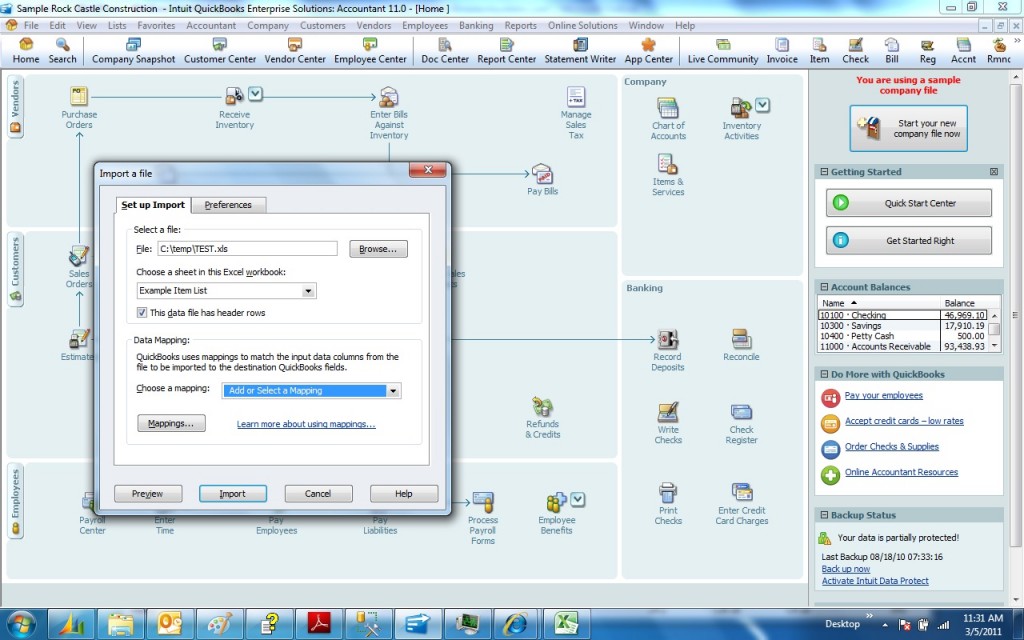
4) Advanced Users. Click on File – Utilities – Import – Excel Files, then Advanced Excel. This option is for slightly advanced users who can work with Excel. First you need a copy of the Excel Example.xls file which you can download from this link. http://support.quickbooks.intuit.com/support/Articles/HOW12247
Build, copy and paste you data into the Excel Example.xls file which has four sheets. Model your data by using their examples.
Select the name of the Excel file, then the name of the sheet. For example select Example Item List. This file has header rows is checked by default.
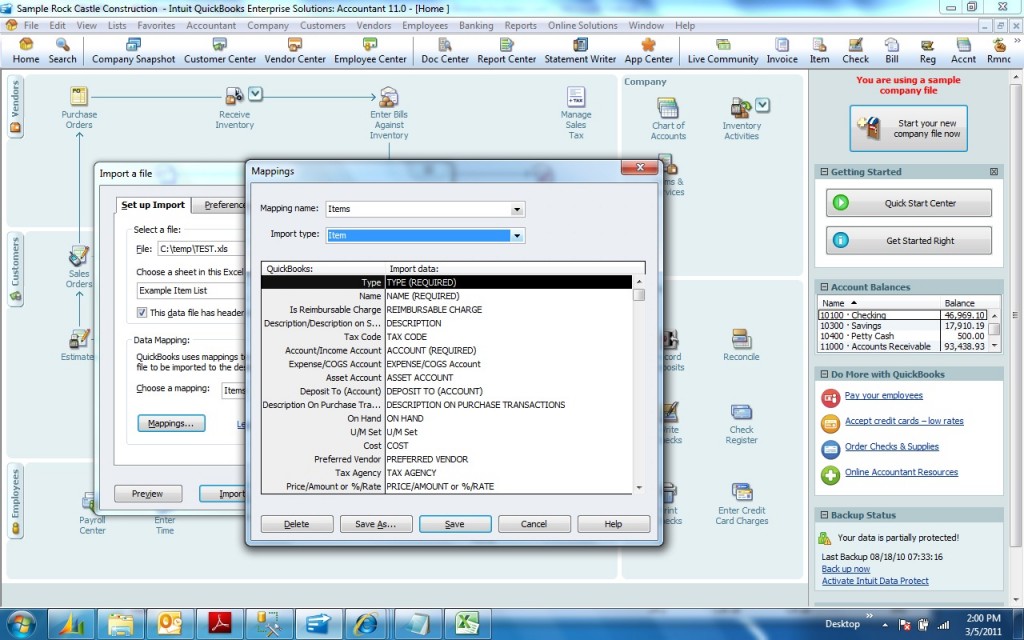
Next click on Mappings. Select an Import Type, example Item List. Map each field on the right, your Import Data to the QB field on the left. Click Save As and give it a name. You can click Preview to preview your data and errors. When ready click Import.
Notice that you have a tab for Preferences were you can better control how duplicates and errors are handled.
5) Transaction Pro Importer. TPI 4.0 by Bay State Consulting is a good add-on for importing list data and transactions. As it’s name implies it is primarily a transaction importer and we have had good success with the product and recommend it. TPI requires a license for each computer or server and may not be the best choice if you run QB in a hosted environment.
6) Autofy. Autofy by Propelware is the best solution to use in a hosted environment such as Right Networks.
[facebook_ilike]


